

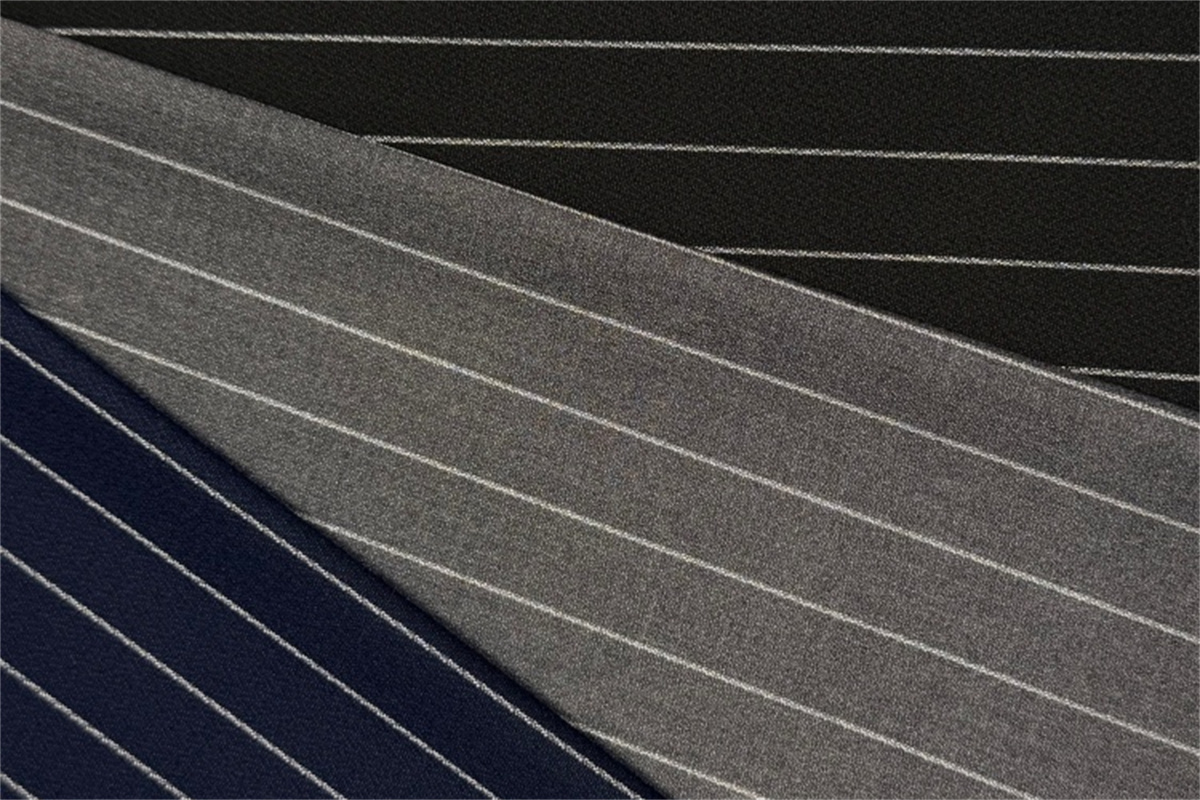
Designing my own stylish blazer can be an exciting journey. I often start by brainstorming ideas for fancy designs for blazers, including fancy designs for making blazers that stand out. Choosing the right fabric is crucial; I prefer polyester rayon or poly wool for their versatility, but I also love exploring linen look designs for blazers for a more relaxed vibe. Additionally, I consider incorporating two tone color designs for blazers to add a unique touch. Common challenges arise, such as selecting the correct pattern size and understanding pattern markings. After preparing my fabric, I focus on essential sewing steps, including spandex designs for blazers that offer comfort and flexibility, as well as stripe designs for blazers that can create a visually appealing effect, to achieve a polished look.
Key Takeaways
- Choose the right fabric for your blazer. Polyester rayon is great for warmer weather, while poly wool is perfect for cooler temperatures.
- Select a pattern that matches your style. Experimenting with different patterns can lead to unique designs that reflect your personality.
- Take your time when cutting and sewing. Accurate measurements and careful sewing techniques ensure a well-fitted and polished blazer.
Selecting Fabrics and Patterns with Fancy Designs for Making Blazers

Choosing Polyester Rayon and Poly Wool Fabrics
When I select fabrics for my blazers, I often gravitate towards polyester rayon and poly wool. These materials offer a perfect blend of comfort and style. Polyester rayon has a soft drape, making it ideal for creating blazers that feel luxurious yet are easy to maintain. I appreciate how this fabric resists wrinkles, allowing me to look polished throughout the day.
Poly wool, on the other hand, provides a structured feel. It holds its shape well, which is essential for achieving that tailored look. This fabric also offers warmth without being overly heavy, making it suitable for various seasons. I often find that blazers made from poly wool have a sophisticated finish, perfect for both casual and formal occasions.
Tip: When choosing between these fabrics, consider the climate and occasion. For warmer weather, polyester rayon is a great choice, while poly wool works well in cooler temperatures.
Picking Patterns That Match Your Style
Selecting the right pattern is just as crucial as choosing the fabric. I often explore various blazer patterns to find one that resonates with my personal style. Here are some popular options I’ve encountered:
| Pattern Name | Features | Likes | Dislikes |
|---|---|---|---|
| Vogue 2853 | Classic design, fully marked, includes all notches, separate collar pieces | Clear instructions, good fit adjustments, options for different lengths | Lengthy instructions for welt pockets, no side seams |
| Jasika Blazer | Similar to Vogue 2853, includes shaping details | Good back vent detail, clear collar/lapel instructions | Requires perfect fit for back vent to look good |
| McCalls 6172 | Detailed fitting instructions, consistent seam allowance | Easy to follow fitting instructions, clear collar/lapel tips | N/A |
| Pauline Alice Saler | Shoulder princess seams, good example of style | Good for multiple makes, clear pattern markings | N/A |
Each pattern influences the overall fit and style of the finished garment. For instance, the drape cut from Anderson & Sheppard creates a relaxed silhouette that flatters the body. In contrast, the military cut from Huntsman offers a structured appearance, perfect for formal settings. I find that understanding these nuances helps me make informed decisions when designing my blazers.
Note: Experimenting with different patterns can lead to unique designs for making blazers that truly reflect your personality.
By carefully selecting fabrics and patterns, I ensure that my blazers not only look stylish but also fit well and feel comfortable. This thoughtful approach allows me to create pieces that I am proud to wear.
Cutting and Sewing the Blazer
Preparing and Cutting Fabric Pieces Accurately
Before I start sewing, I take time to prepare and cut my fabric pieces accurately. This step is crucial for achieving a well-fitted blazer. I gather essential tools to make this process easier and more precise. Here’s what I typically use:
- Blazer pattern
- Scissors
- Measuring tape
- Sewing pins
- Sewing machine
- Fabric with matching thread
- Iron and ironing board
- Closures (optional)
I begin by laying out my fabric on a flat surface. I ensure it is wrinkle-free by giving it a good press with the iron. Next, I carefully pin the blazer pattern onto the fabric, making sure to align the grainlines correctly. This alignment helps the blazer hang properly once finished.
Using sharp scissors, I cut around the pattern pieces, following the lines closely. I pay special attention to notches and markings, as these guide me during the sewing process. After cutting, I label each piece to avoid confusion later. This organization saves me time and effort when I start assembling the blazer.
Tip: Always double-check your measurements before cutting. It’s better to measure twice and cut once to avoid mistakes.
Sewing the Blazer Body and Attaching Sleeves
Once I have all my fabric pieces cut, I move on to sewing the blazer body and attaching the sleeves. I find that using the right sewing techniques is essential for creating strong and neat seams. Here are some seam finishes I often use:
| Seam Finish | Description | Best For |
|---|---|---|
| Flat Felled Seams | One of the strongest seam finishes, encloses raw edges and pressed flat. | Hard wearing items like jackets and jeans. |
| Bias Bound Seams | Strong finish that wraps binding around raw edges for a clean look. | Exposed seams in unlined jackets and formal wear. |
| Hong Kong Binding | Similar to bias bound but finished differently on the unexposed side. | Exposed seams in unlined jackets, especially thick fabrics. |
| French Seams | Provides a clean finish without needing an overlocker, suitable for light fabrics. | Light to mid-weight and sheer fabrics. |
| Turn and Straight Stitch | Simple finish by turning back raw edges and stitching. | Most fabrics, especially straight seams. |
| Zig-Zag Finish | Quick and simple, but less durable over time. | Mid-weight, stable fabrics. |
I usually start by sewing the shoulder seams together, followed by the side seams. I press each seam open as I go, which helps maintain a crisp look. After completing the body, I attach the sleeves. I align the sleeve caps with the armholes, ensuring a smooth fit. I often use a basting stitch to temporarily hold the sleeves in place before sewing them permanently.
Note: Take your time when attaching sleeves. A well-fitted sleeve can make a significant difference in the overall appearance of the blazer.
By following these steps, I create a solid foundation for my blazer. The cutting and sewing process requires patience and precision, but the results are always worth the effort.
Finishing and Styling Your Blazer
Adding Lining, Interfacing, and Hemming
To elevate my blazer, I always add a lining and interfacing. Lining enhances comfort and gives the blazer a polished finish. I often choose Bemberg for its breathability and luxurious feel. This material controls sweat and humidity, making it ideal for various climates. Here’s a quick comparison of common lining materials I consider:
| Lining Material | Comfort Characteristics | Durability Characteristics | Additional Notes |
|---|---|---|---|
| Bemberg (Cupro) | Highly breathable, silky-smooth | Durable, practical for year-round wear | Eco-friendly, blends luxury with functionality |
| Polyester | Affordable, resists wrinkles | Very durable but lacks breathability | Common in off-the-rack suits |
| Cotton | Soft, breathable | Less smooth, wrinkles easily | Ideal for casual blazers |
| Viscose & Rayon | Soft feel, breathable | Less durable than polyester | Mid-range option offering comfort |
Interfacing is another critical component. It provides support and shape retention, which is essential for the blazer’s structure. I prefer sew-in interfacing for its natural fluidity. Fusible options can sometimes lead to stiffness, which I try to avoid. Properly applied interfacing enhances the blazer’s silhouette, ensuring it maintains its intended shape over time.
Styling Tips to Enhance Your Blazer’s Look
Once my blazer is assembled, I focus on styling. Accessories can transform a simple blazer into a statement piece. I often pair my blazers with:
- Statement Jewelry: A bold necklace or earrings can add flair.
- Scarves: A colorful scarf can introduce texture and warmth.
- Footwear: Stylish shoes, whether heels or loafers, can elevate the overall look.
I also consider the fit. A well-tailored blazer should hug my shoulders and taper at the waist. I often experiment with different lengths and styles to find what flatters my figure best.
Tip: Don’t shy away from mixing patterns and textures. A striped shirt under a solid blazer can create a visually appealing contrast.
By focusing on these finishing touches and styling tips, I ensure my blazers not only look great but also reflect my personal style.
Designing and sewing a stylish blazer involves several key steps. I recommend following this process:
- Choose appropriate fabric based on temperature and comfort.
- Purchase fabric according to the pattern’s yardage requirements.
- Cut out paper pattern pieces according to the blazer size.
- Cut fabric pieces using the paper patterns, aligning with fabric grain.
- Optionally, sew a practice blazer to check fit.
- Pin lapel pieces to the front panel pieces, aligning edges and shoulders.
- Sew lapels onto front panels with a straight stitch.
- Pin back pieces face to face and sew along the center edge.
- Arrange front pieces on the back piece with right sides facing down and pin edges.
- Sew shoulders and outer sides of the blazer to form the body.
- Iron cuffs, lapels, and hemline to create creases for easier folding and stitching.
- Hem cuffs, lapels, and bottom using topstitch or zigzag stitch to prevent fraying.
- Attach buttons or snaps as embellishments, marking placement with tailor’s chalk.
I encourage you to experiment with polyester rayon and poly wool fabrics. These materials can help you create unique designs for making blazers that reflect your personal style. Embrace the process and gain confidence in crafting fashionable, personalized blazers.
FAQ
What tools do I need to sew a blazer?
I recommend using scissors, a sewing machine, pins, measuring tape, and an iron for best results.
How long does it take to sew a blazer?
Sewing a blazer typically takes me several hours, depending on my skill level and the complexity of the design.
Can I use different fabrics for a blazer?
Absolutely! I often experiment with various fabrics like linen or cotton for different styles and comfort levels.
Post time: Apr-13-2026